
Creating a website can seem overwhelming, but with the right tools and guidance, it becomes an achievable goal. This guide will walk you through every step of the process, from defining your website’s purpose to publishing it live. Let’s dive in!
Step 1: Define Your Website Goal
Before building a website, define its purpose. Ask yourself:
- Is it for personal branding, e-commerce, blogging, or a portfolio?
- Who is your target audience?
- What features do you need (e.g., contact forms, online store)?

Step 2: Choose a Domain Name
Your domain name is your website’s address (e.g., www.faddat.com). Choose something:
- Short and memorable.
- Relevant to your niche.
- Easy to spell and type.
Helpful Tools for Brainstorming:
- DomainWheel: Generates domain name ideas based on your keywords.
- LeanDomainSearch: Finds available domain names quickly.
Top Domain Registrars:
- Namecheap: Affordable with prices starting at $5/year.
- GoDaddy: Offers domain and hosting bundles, prices start at $11.99/year.
- Google Domains: Simple interface, starts at $12/year.
Step 3: Select a Hosting Provider
Web hosting stores your website files and makes them accessible online. Choosing a hosting provider with servers close to your target audience can reduce latency and improve website speed, which are critical for SEO performance.
Affordable Hosting Providers:
- Hostinger: Plans start at $2.99/month with excellent uptime and free SSL. (Faddat suggest)
- Bluehost: Beginner-friendly, plans from $2.95/month.
- SiteGround: Known for speed and support, starting at $3.99/month.
| Provider | Starting Price (per month) | Features |
|---|---|---|
| Hostinger | $2.99 | Free SSL, 100 GB bandwidth, 24/7 support |
| Bluehost | $2.95 | Free domain for 1 year, 50 GB SSD, WordPress integration |
| SiteGround | $3.99 | Daily backups, Free CDN, Advanced security |
Step 4: Pick a Website Builder
Website builders simplify the design process, no coding required.
Popular Website Builders:
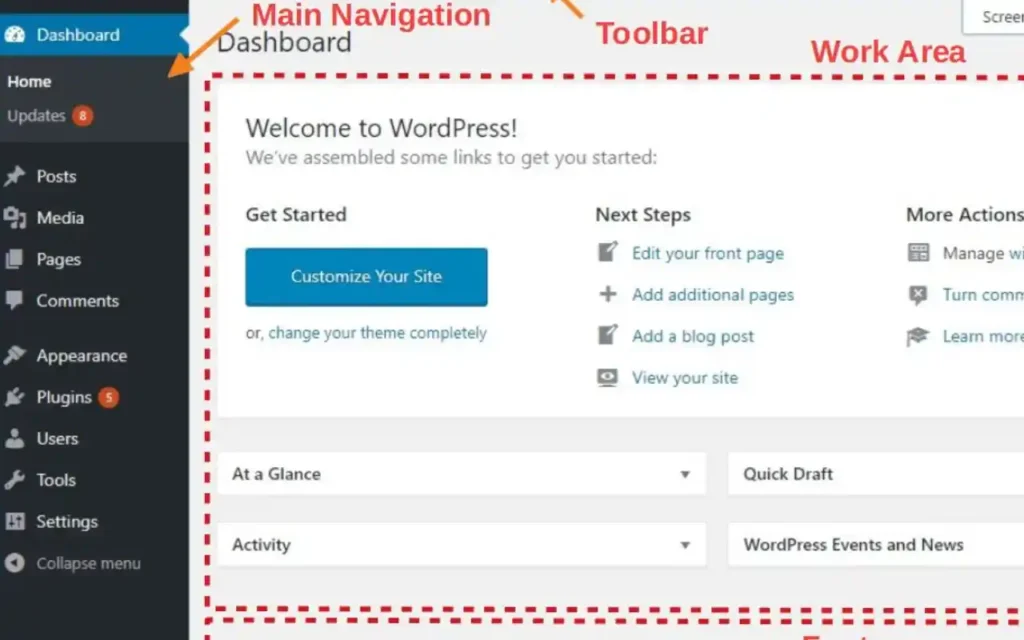
- WordPress.org: Free, highly customizable, requires hosting.
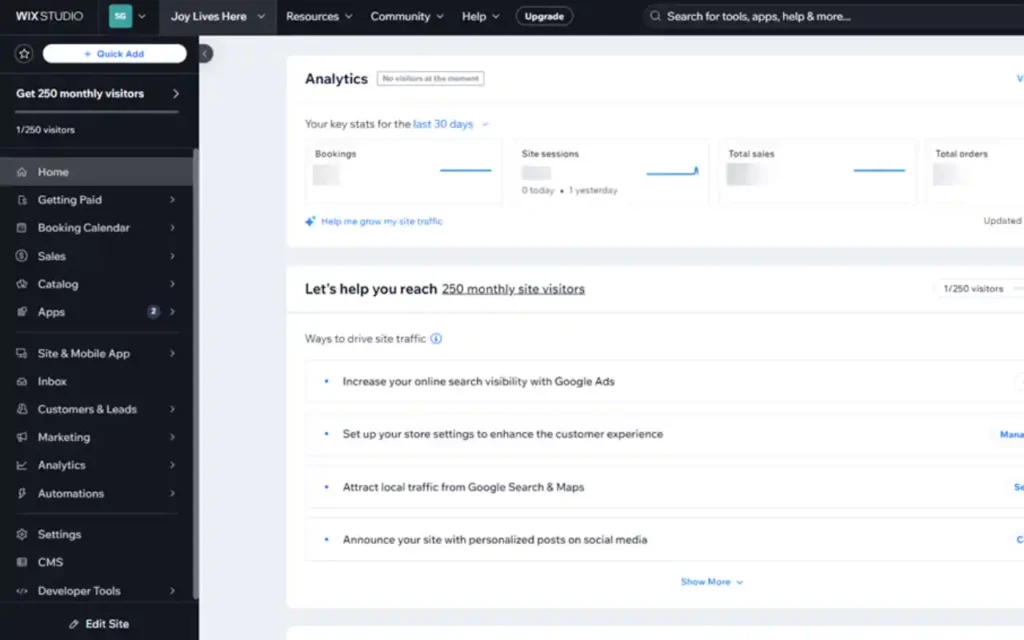
- Wix: Drag-and-drop, plans start at $14/month.
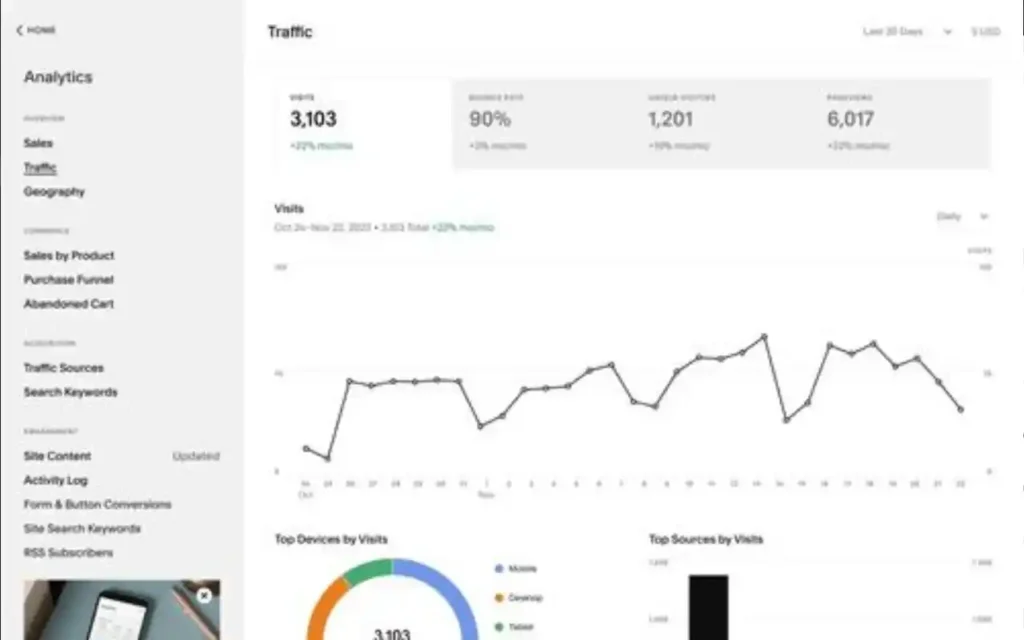
- Squarespace: Stylish templates, plans start at $16/month.
Step 5: Design Your Website
Choose a theme or template that aligns with your brand. Customize:
- Colors and fonts.
- Logo (use tools like Canva or Looka to design a logo).
- Layout for user-friendliness.
Logo Design Tools:
- Canva: Free with premium options, beginner-friendly.
- Looka: AI-powered logo generator, plans start at $20.
- Hatchful by Shopify: Free with pre-designed templates.
Step 6: Create Essential Pages
Every website needs a few key pages:
- Home: Introduce your brand.
- About: Share your story and mission.
- Contact: Include a form, email, and social links.
- Blog: Optional but great for content marketing.

Step 7: Write Compelling Content
Craft content that:
- Is clear and engaging.
- Answers user questions.
- Includes keywords for SEO (use tools like Ahrefs or SEMrush to find keywords).
Step 8: Optimize for SEO
Search Engine Optimization (SEO) helps your website rank on Google.
- Basic Tips:
- Use descriptive meta titles and descriptions.
- Add alt text for images.
- Build internal and external links.
- Keyword Research Tools:
- Ahrefs: Advanced SEO tools, starts at $99/month.
- SEMrush: All-in-one SEO, starts at $119.95/month.
- Ubersuggest: Free for basic features.
Step 9: Publish Your Website
Once your website is ready, hit publish!
Don’t Forget:
- Submit Sitemap to Google:
- A sitemap helps Google understand your website’s structure and find all your pages efficiently. Use Google Search Console to upload your sitemap for indexing.
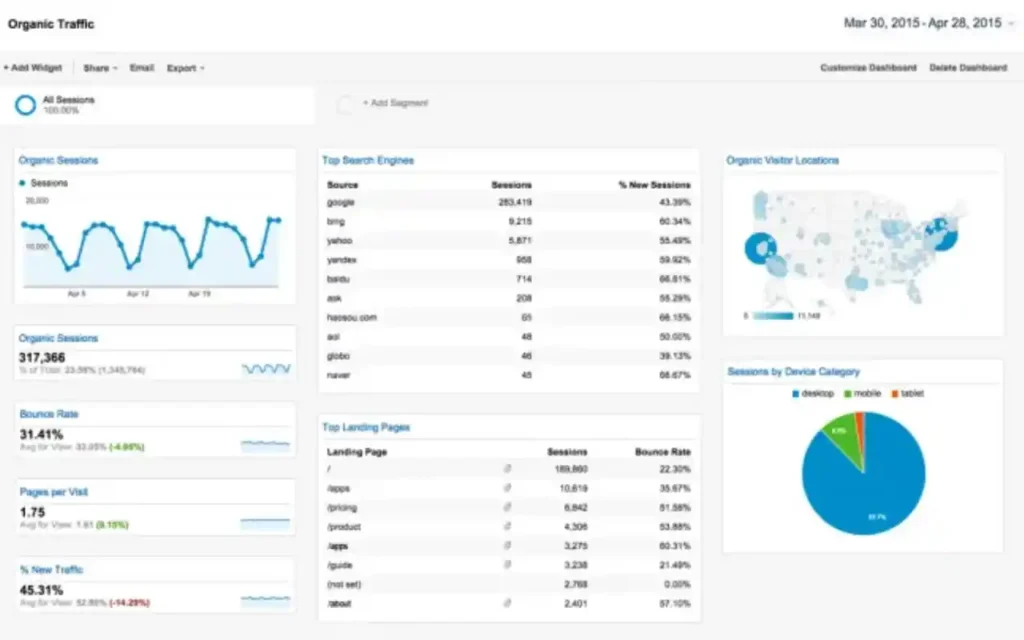
- Set Up Analytics:
- Install Google Analytics to track visitor behavior.
Conclusion
Creating a website is a structured process that becomes simple with the right tools and clear goals. Start small, grow over time, and ensure regular updates to keep your website relevant and engaging.